Managing your Competitor Tab
Last updated: October 6, 2026
Rankscale uses auto-discovery to identify and track competitors that appear in AI responses alongside your brand. This article explains how to review competitor names, control which competitors are tracked, and adjust how auto discovery builds your list.
Name Variations
AI engines sometimes refer to the same brand in different ways, and Rankscale groups those variations together so your data stays consistent.
To see them, go to the Competitor Analysis card and click a brand's name area. The row expands to show every name variation Rankscale has grouped under that brand.
You can add further name variations for your own brand in your Brand Settings. See 📄 Managing Brand and Product Names
You can also correct a single name directly from this tab. Use Reclassify on a row or on an expanded variation and choose Treat as your own brand.
How Auto Discovery Builds your List
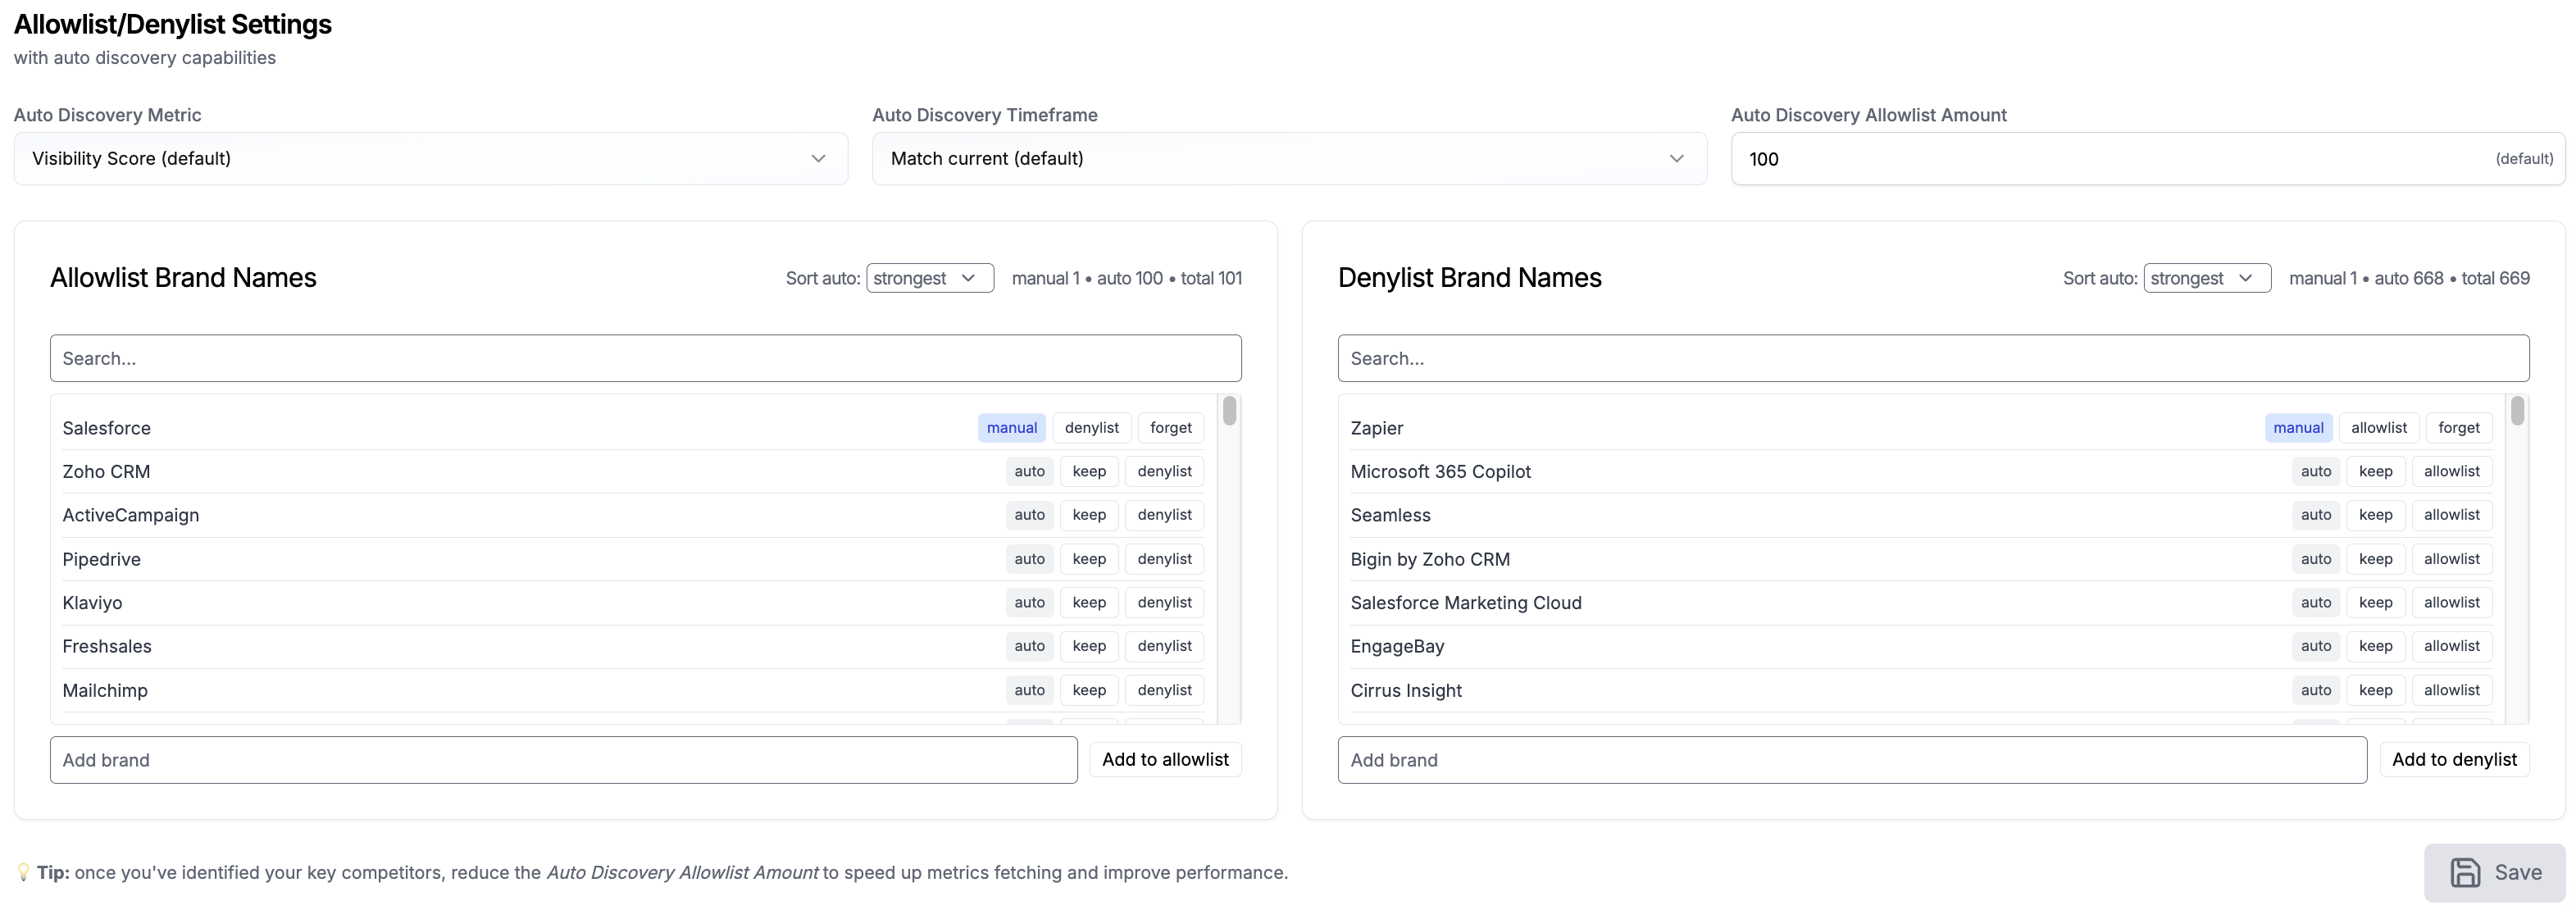
Auto discovery picks up the brands that appear most often alongside yours and adds them to your competitor list. Three settings at the top of the Allowlist/Denylist Settings card control how it chooses.
Auto Discovery Metric decides what "most often" means. The default is Visibility Score. You can also rank by Mentions, Average Rank, Detection Rate, Sentiment, or Citations.
Auto Discovery Timeframe sets the period it looks at. The default, Match current, follows the time range you have selected on the tab. You can pin it to 24 Hours, 7 Days, or 30 Days instead.
Auto Discovery Allowlist Amount sets how many competitors it keeps, from 0 to 1000.
Tip: Once you know which competitors matter to you, lower the Auto Discovery Allowlist Amount. A shorter list makes your metrics load faster.
Your list refreshes after each new run and whenever you save these settings, so a newly discovered competitor appears from the next run onwards.
Allowlist and Denylist Settings
At the bottom of the Competitors tab you will find Allowlist/Denylist Settings. This gives you control over which competitors Rankscale tracks.
Adding a competitor manually. If auto discovery has not picked up a competitor you want to track, type the name into Allowlist Brand Names and click Add to allowlist.
Removing an unwanted competitor. If auto discovery picked up a brand that is not a relevant competitor, add it to Denylist Brand Names with Add to denylist. It is then excluded from your competitor data.
Warning: Nothing in this card takes effect until you click Save at the bottom right of it. If you add a name and leave the page without saving, the change is lost.
Adding a name to one list removes it from the other, so you never have to clean up the old entry.
When your List Looks Empty or Short
A brand with little recent activity can show few competitors, or none at all. Two things usually explain it:
The selected time range is too short. Widen it, or set Auto Discovery Timeframe to a longer period.
The brand has not had a recent run. Trigger one and the list fills after it completes.
Filters change what you see on the tab, not what gets saved to your competitor list.